In OCI, one of the authentication mechanism is using "Instance Principals". Here we don't need to use a key to execute OCI CLI commands, instead of key we are allowing OCI Compute instance the permission to execute CLI commands.
In this video you can see the steps.
1. Get the OCID of the compute instance
2. Create a Dynamic group
3. Create a Policy
4. Validate the setup
5. Execute your CLI commands {oci os object put --bucket-name backup-bucket --file sc_laundry_db-202412181734507003.sql --auth instance_principal}
I am trying to mount OCI Object Storage bucket as a file system in one of my application server. It will helps me a lot to take backups and in automation I can point this OCI bucket as the destination of scripts output. As OCI object storage is S3 compatible, I am here using S3fs-fuse utility to mount the bucket.
OS : Oracle Linux 9
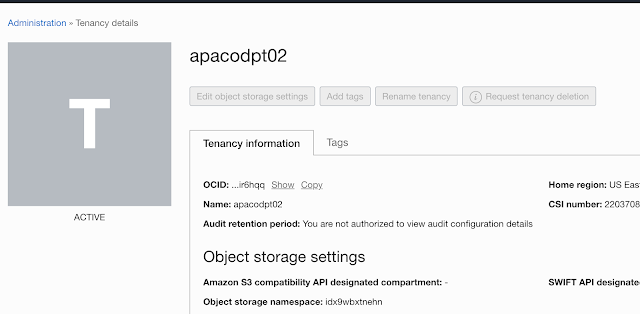
As a pre-request, please make sure that the compartment you are trying to mount the object storage is S3 compatible.
Go to "Governance & Administration --> Tenancy Details --> Edit object storage settings"
Now follow the below steps.
Step 1 : SSH to your application server
Step 2 : dnf update -y
Step 3 : vi /etc/yum.repos.d/oracle-epel-ol9.repo
Step 4 : Update "enabled=0" to "enabled=1" and save the file
Step 5 : yum install s3fs-fuse -y
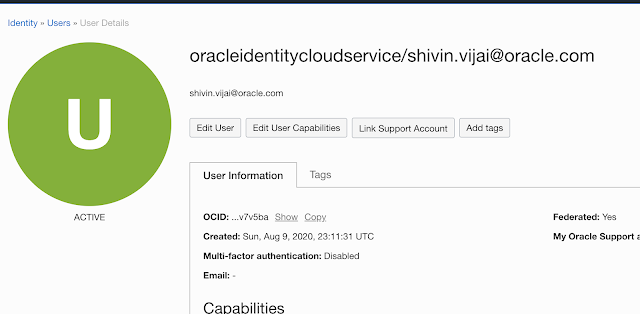
Step 6 : Login to OCI console and generate your "Access key" and "Secret key" (keep it safe with you)
Step 7 : SSH to application server
Step 8 : vi /home/opc/.passwd-s3fs
Step 9 : Input your Access key id : Secret key id (Both in one line with a colon separated)
Step 10 : chmod 600 /home/opc/.passwd-s3fs
Step 11 : Create bucket in your OCI account (My bucket name is skynet-upload-bucket)
Step 12 : Identify your OCI region identifier (https://docs.oracle.com/en-us/iaas/Content/General/Concepts/regions.htm)
# oci os object put -bn my-upload-bucket --file mssql-july31.sql
In this example, the backup file is mssql-july31.sql and this should be in the path or you need to add the full path and the bucket name is my-upload-bucket.
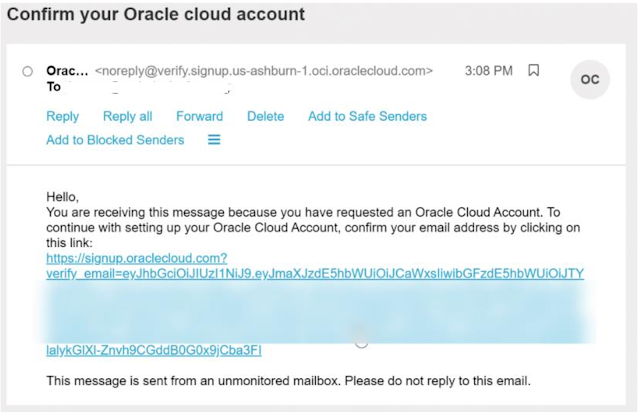
Once you have entered a valid email address, select the Verify my email button.
Go to your email. You will see an account validation email from Oracle in your inbox. The
email will be similar to the following
Select the link (if possible) or copy and paste the link into your browser.
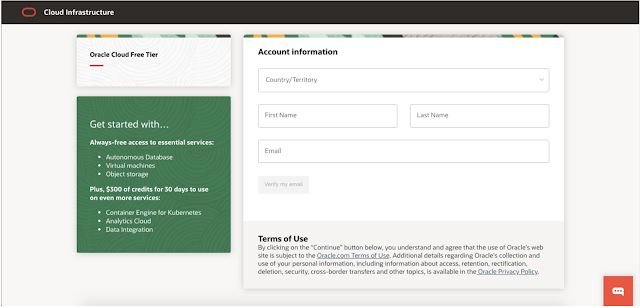
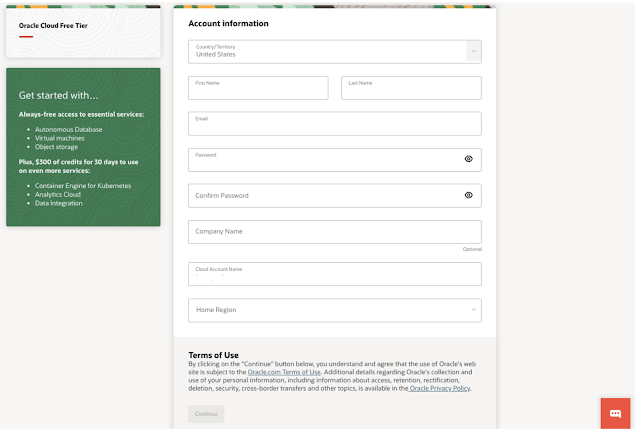
Enter the following information to create your Oracle Cloud Free Tier account.
Choose a Password Enter your Company Name
Your Cloud Account Name will generate automatically based on your inputs. You can
change that name by entering a new value. Remember what you wrote. You'll need
this name later to sign in.
Choose a Home Region. Your Home Region cannot be changed once you sign-up.
Note: Based on the current design of the workshop and resource availability, it is
recommended not to use the London region for this workshop at this time.
Click Continue
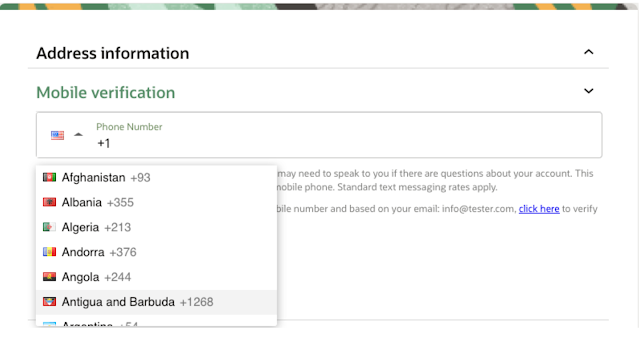
Enter your Address information. Click Continue.
Choose your country and enter a mobile number for verification. Click the Text me a code
button.
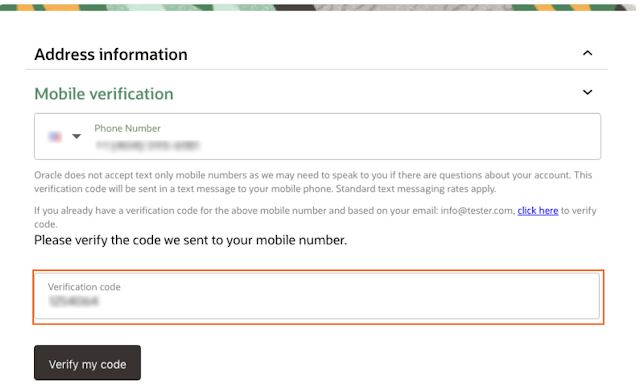
Once you receive your code, enter it and click Verify My Code.
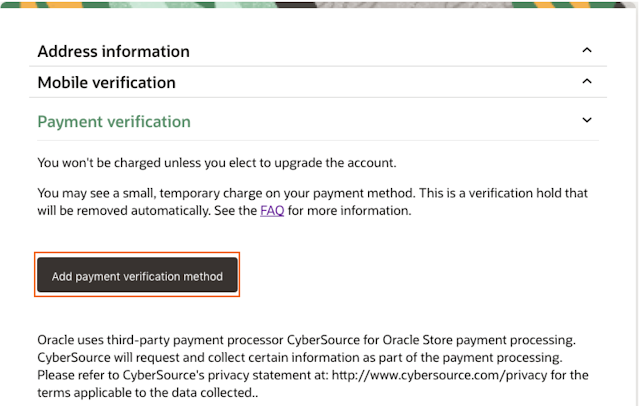
Click the Add payment verification method button.
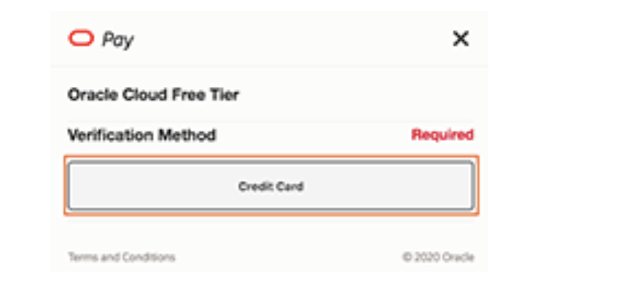
Choose the verification method. In this case, click the Credit Card button. Enter your
information and payment details.
Note: This is a free credit promotion account. You will not be charged unless you elect to
upgrade the account.
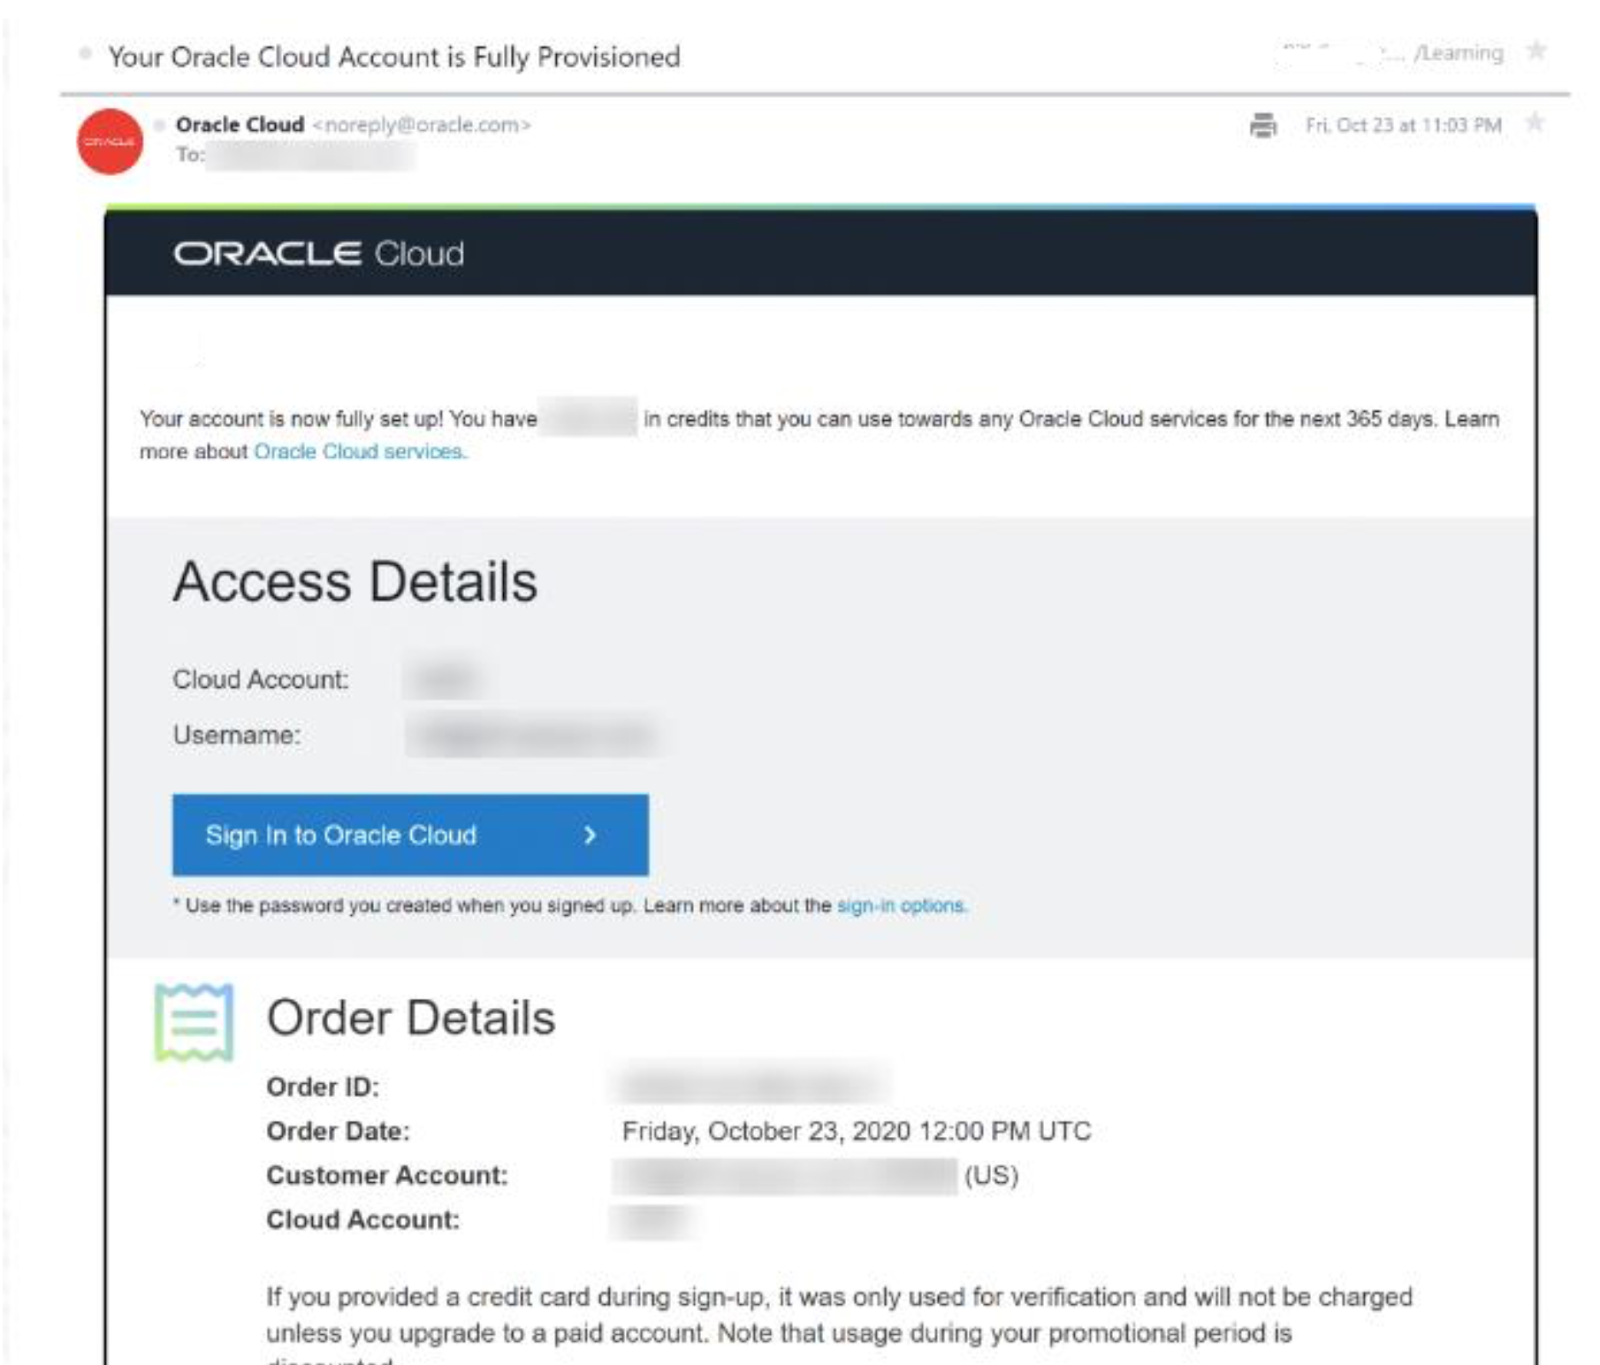
Once your payment verification is complete, review and accept the agreement by clicking the check box. Click the Start my free trial button.
Your account is provisioning and should be available soon! You might want to log out as
you wait for your account to be provisioned. You'll receive two emails from Oracle. One
email will be the initial notification that provisioning is underway. The other email will be a
notification that provisioning is complete. Here is a copy of the final notification:
Attaching Block Volume Storage in Oracle Cloud Infrastructure Instance
1. Login to your OCI console, search for block volume or from the left hamburger menu, select "Storage" then "Block Volume" then "Create Block Volume"
2. Input your block volume name, compartment, AD, block volume size etc.
3. Once it is created, go to your instance and from left side you can see "Attach Block Volumes" Then you need to make sure the attach type, compartment.
4. At the right of the side, you can see "iSCSI Commands & Information", click on that, you will see the commands to attach the volume to the instance.
5. Login to the linux instance. Issue the above commands. You can see a successful message.
6. Now to identify attach volume or device use unix command lsblk. This command helps you to identify the device for me its /dev/sbd
7. Format the disk using unix command fdisk and make file system using unix commnd mkfs as you want in this case i am gong to make it as ext4 command is mkfs.ext4 /dev/sbb.
8. Create a folder directory for the mount mkdir /data
9. For permanent mounting you need to add an entry in /etc/fstab
/dev/sbd1 /data ext4 defaults,noatime,_netdev 0 2
10. Now we are going to mount. mount /dev/sdb1 /data
That's it. You can verify it using the command df -h
I am trying to install a gateway node setup using a OCI-classic. Though i could complete the action install,configure & start in sequence, i am unable to finish the JOIN action. I am doing the steps in sequence. Below is the snip of the logs that i have got from registerNode.log (full logs attached as a image): DEBUG:root:Performing dev env SSL related workarounds ERROR:root:Error: Unable to add grant , reason = ['Traceback (most recent call last):\n', ' File "APIGateway.py", line 2246, in addGrantToUser\n resp = urllib2.urlopen(request,data = addGrantJson,context=sslContext)\n', ' File "urllib2.py", line 154, in urlopen\n', ' File "urllib2.py", line 429, in open\n', ' File "urllib2.py", line 447, in _open\n', ' File "urllib2.py", line 407, in _call_chain\n', ' File "urllib2.py", line 1241, in https_open\n', ' File "urllib2.py", line 1201, in do_open\n', ' File "httplib.py", line 1121, in getresponse\n', ' File "httplib.py", line 438, in begin\n', ' File "httplib.py", line 402, in _read_status\n', "BadStatusLine: ''\n"] WARNING:root:Gateway runtime user could not be given the requisite node service account grants INFO:status:complete action: join isSuccess: failed detail: {"status": "NOT_JOINED"} ERROR:main:Action join has failed. Detail: {"status": "NOT_JOINED"} INFO:main:Gateway join complete.Status = NOT_JOINED.Please check log files for more details I am pretty sure that i have the entered Gateway runtime user in the node service account grants of the logical gateway itself. The gatewayExecutionMode is Development. And, i have checked the status of the gateway node but it looks alright. I have attached the logs as image. I doubt this is related to network. But, could someone please give me a clarity on this ? Solution : Check your MTU setting for the network interface of the gateway node machine. It should be 1500. For more details, how to set the MTU to 1500 (http://www.linuxblackmagic.com/search/label/MTU)
Purpose: This document will help to create NFS file storage system in OCI. We mainly used this storage for Kubernetes application storage. The docker running on this host will automatically mount this storage. Steps in creating NFS filer are the following: 1. Login to your cloud account. 2. From Action Menu, select File Storage
3. Click on "Create File System", choose the compartment, input the name and availability domain.
4. Click on the "mydatastore" File Storage, you can see mount targets and its details.
5. Note down the commands for mounting this datastore into the client machines, by clicking on "mount commands" 6. Login to the client machine and issue the noted mount commands. 7. Check df -h or fdisk -l to verify the mounts.
Oracle MySQL Cloud Service is a single MySQL server having full access to the features and its operations.
Steps in creating an instance of Oracle MySQL Cloud Service
1. Login to your cloud account.
2. From Action Menu, select Open Service Console
3. Click Create Service
4. Input the Instance Name, Region and Availability Domain
5. Next page, input the compute shape, ssh key, cloud storage container, username, password, storage size, administrator username, password, database schema name and port.
6. Once you confirm, you could see the mysql instance running in your dashboard.
7. With your ssh keys and inputed connection string, you can either ssh or connect database from your application.
Purpose: Object storage in OCI is an internet-scale, high-performance storage platform that offers reliable and cost-efficient data durability. It can hold your static contents like images, pdfs, files etc. There are two types of storage tier - Standard (hot storage) and Archive (cold storage). Steps in creating Object Storage: 1. Login to your OCI account. 2. Navigate to Menu --> Object Storage --> Object Storage
3. Click on "Create Bucket" 4. Select the storage tier, by default it will be Standard
Purpose: Creating an OKE cluster in OCI. Once cluster is ready, you can deploy your application. Assumption: 1. You already have an OCI account with proper roles and policies to create and configure OKE. 2. You have a VCN, subnets Steps in setup and configuration: 1. Login to your OCI account. 2. Navigate to Menu --> Developer Services --> Container Clusters (OKE)
3. Choose the correct compartment 4. Click on the "Create Cluster" button and input the name, K8s version, VCN, subnets and if needed the CIDR block for the b8s service.